
Record expenses 3 ways: by hand, typed to the AI, or a receipt photo
Use whichever is fastest at the moment. Bought one thing? Enter it by hand. Back from the market with a bag of shopping? Type it to the AI. Got a receipt or a bank transfer slip? Take a photo. Every method ends up in the same place: the list on Home, sorted by category.
- Set up your categories first. The AI can only choose from the categories you have. If you haven't done it yet, see Guide 1 (5 minutes).
- The free plan includes 10 AI uses a month. One message or one photo counts as one use, so typing all your items in a single message goes further. Entering by hand never uses the quota.
Way 1: Enter it by hand (no AI quota used)
-
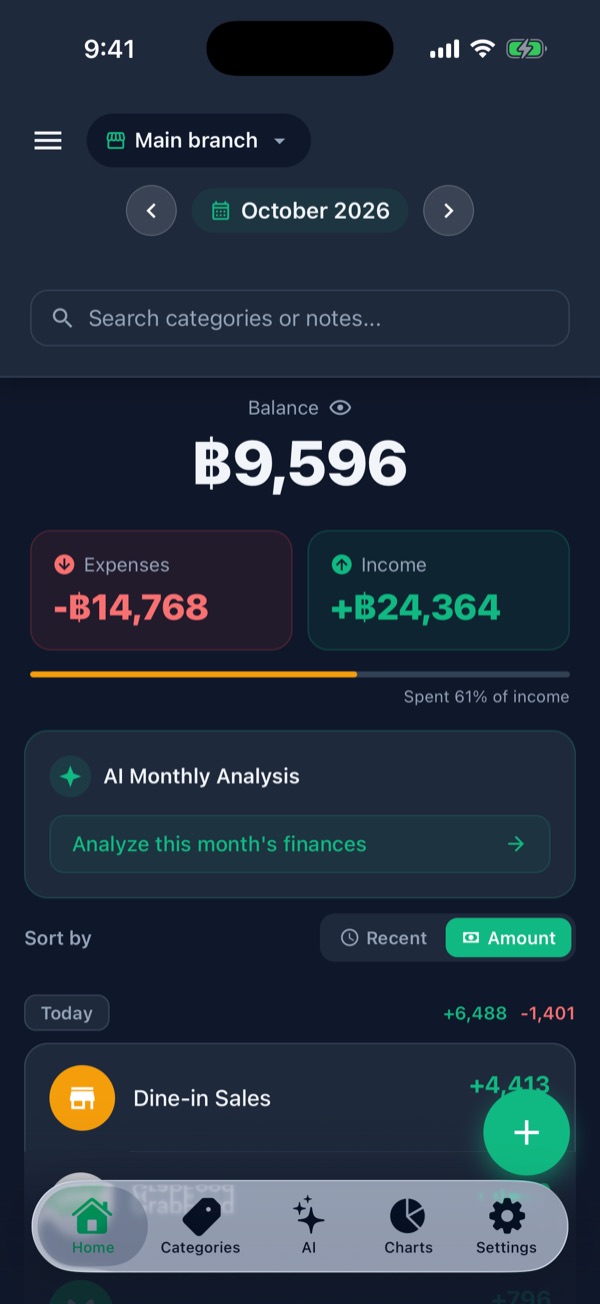
Tap the green + on Home
The + button is at the bottom right of Home 1. The top of the screen sums up this month's expenses, income and balance, and updates as soon as you save.
-
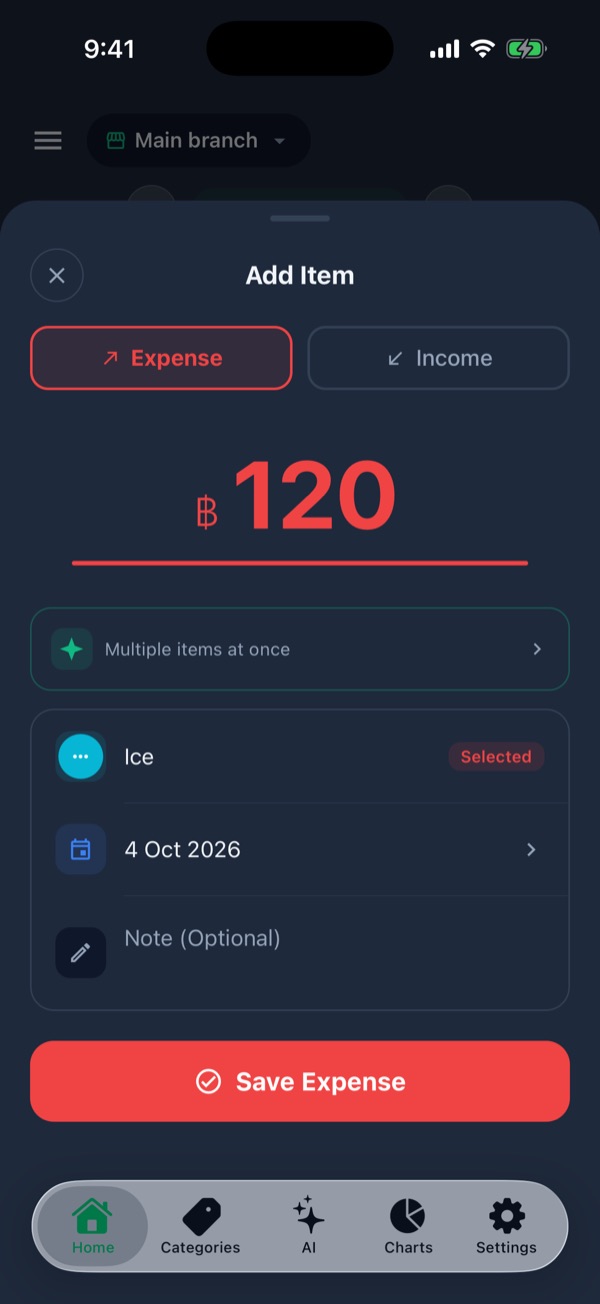
Enter the amount, pick a category, save
- Expense is already selected (tap “Income” to record sales)
- Type the amount 1
- Tap Select Category 2 and choose an icon. They're in the order you set on the Categories tab.
- The date is today; tap it to change. Add a short note if you like, e.g. the supplier's name.
- Tap Save Expense 3
Way 2: Type it to the AI (fastest for several items)
-
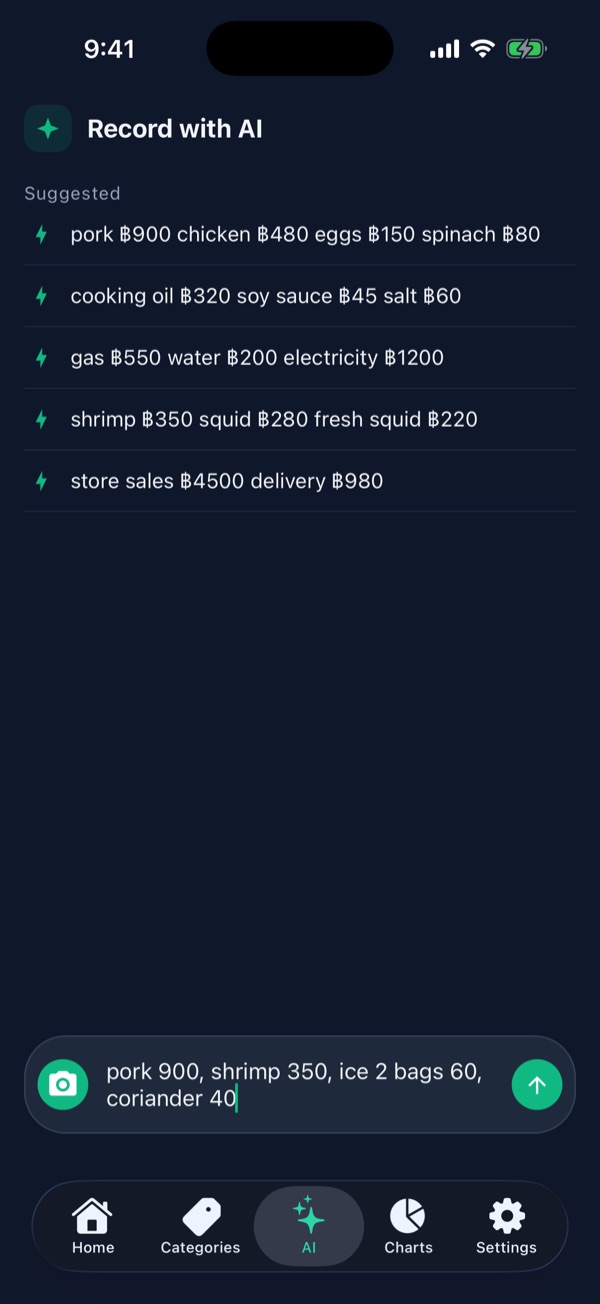
Open the AI tab and type it the way you'd say it
Tap AI in the bottom bar and type everything you bought in one message 1. No special format needed, for example:
pork 900, shrimp 350, ice 2 bags 60, coriander 40
Then tap the arrow 2. Not sure what to write? Tap one of the suggestions at the top to try it.
-
Check what the AI found, then save
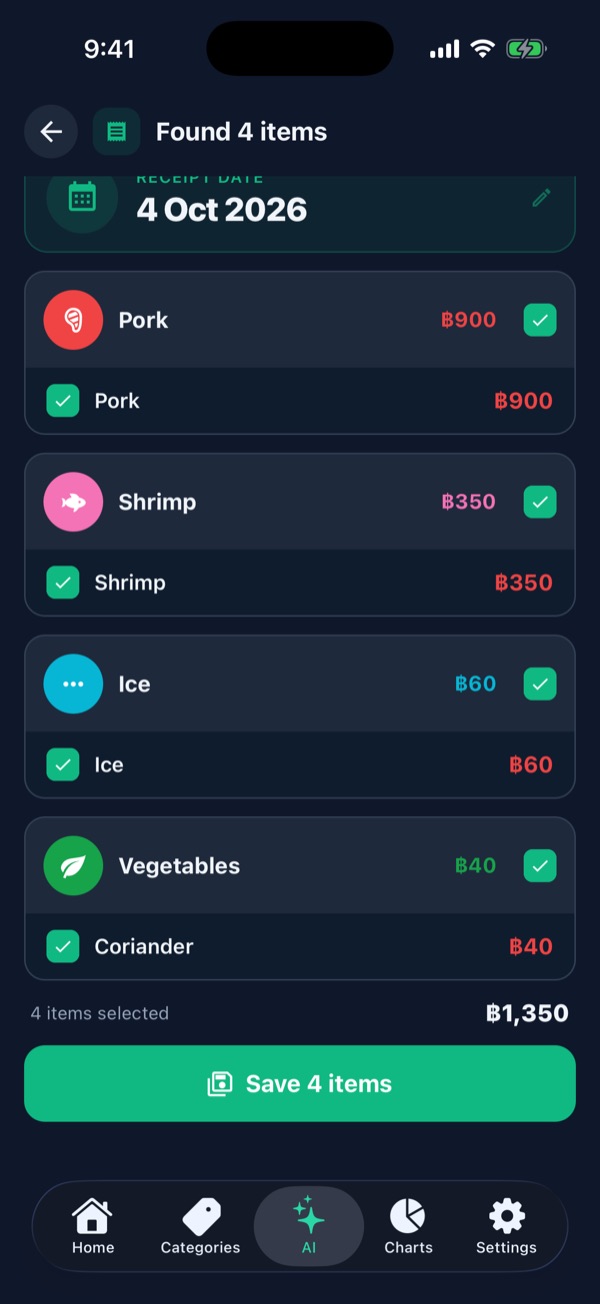
The AI splits your message into items and puts each in a category. Untick anything you don't want, tap the pencil on the date card if you bought it on another day, then tap Save n items 3.
“Ice” went straight into the Ice category we just created 2. Set up categories well and the AI files things correctly.
⚠️ Check before you saveHere shrimp went into Shrimp 1, but in the same test in Thai it went into Seafood, because both categories fit (how to avoid that). You can't change the category on this screen yet. Save first, then move the item as shown in step 6.
Way 3: Photograph a receipt or bank transfer slip
-
Tap the camera on the AI tab
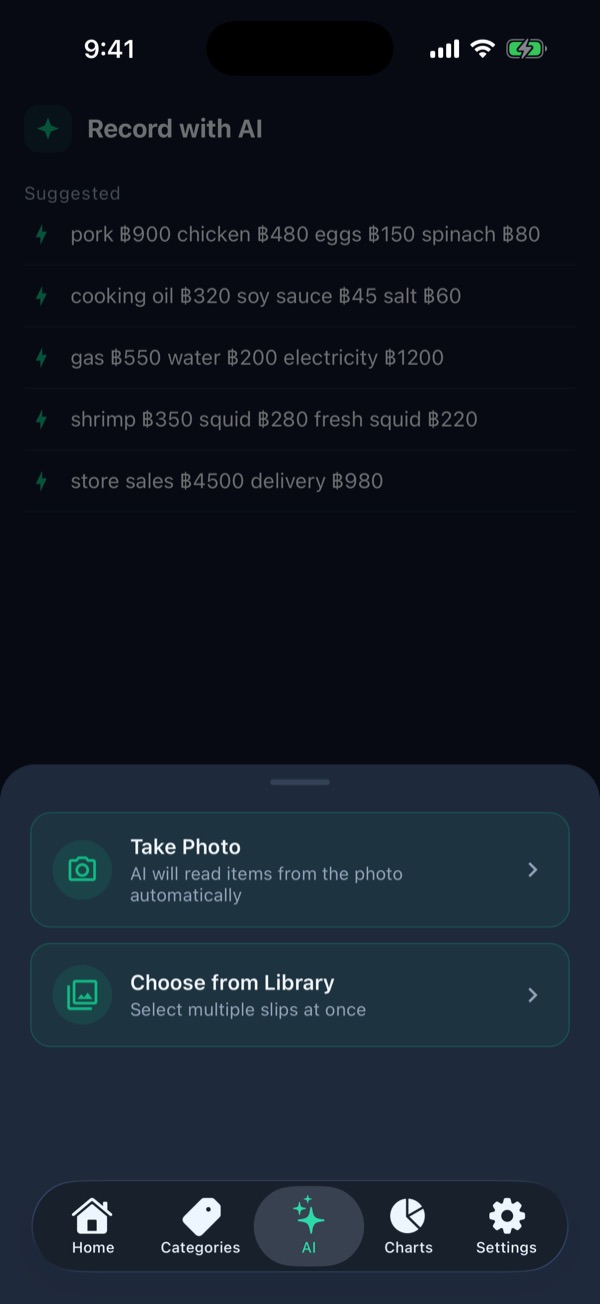
Tap the green camera button to the left of the text box, then choose:
- Take Photo 1: snap the receipt in front of you
- Choose from Library 2: pick several transfer slips at once
The AI reads both receipts and bank transfer slips, uses the date printed on the slip, and takes you to the same review screen as Way 2.
Slips you've already recorded are skipped automatically, so you won't record anything twice. But each photo is one AI use, so on the free plan only pick slips you haven't recorded yet.
Wrong category? Move it in two taps
-
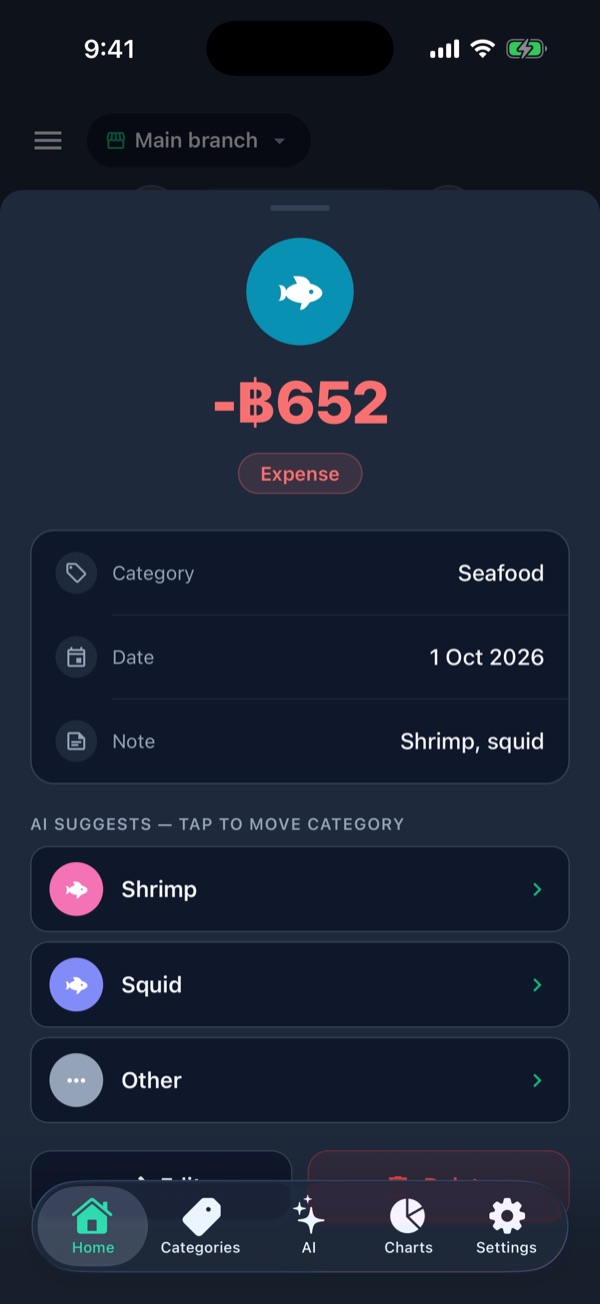
Tap the item, then “AI Suggest Category”
On Home, tap the item that's in the wrong category (type in the search box at the top to find it quickly), then tap AI Suggest Category. The AI offers better-fitting categories 1; tap one to move the item straight away.
Or tap Edit, just below, to change the amount, category or date yourself (no AI quota used).
Tips for recording every day
- Record at closing time every day. It takes under 2 minutes, far easier than chasing a month of receipts at the end of the month.
- Take clear photos. The whole receipt, good light, not tilted. The sharper the numbers, the better the AI reads them.
- Record your sales too. Same steps, but choose “Income”, or tell the AI “dine-in sales 4500 Grab 980”. The app then works out your profit.
- Several people can record. Invite your staff to the same shop and everyone records into one set of books.